July 16, 2015 1:06 pm

DIY Whitewashed Floors

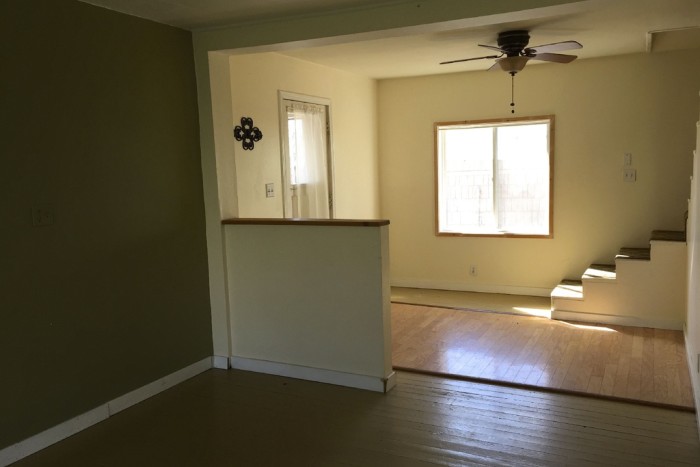
When we bought our house, the living room floor was painted this weird dark yellowy-green color. It wasn’t the worst, but it also wasn’t my taste and really, half the fun of owning your home is getting to update it to something you like.

Before:

living-room

entryway

IMG_3415.JPG

We initially contemplated about having a new hardwood flooring and laminate vinyl flooring installation or just to have a DIY project. Eventually, we embarked on a DIY floor refinishing project despite being complete novices at anything resembling home improvement. My ultimate goal was very light, semi-uniform-looking floorboards. It feels almost indescribably sinful to paint hardwoods, but our floors are fir (so not very hard) and have plug repairs, a largeish burn mark, and tons of puttied knots, nail holes, and other blemishes. In short, they’re not perfect. Plus, many of them are reddish, so whitewashing them seemed like a good solution in terms of unifying the color and lightening them up a bit while still being able to see the grain. Offer Hardwood Floor Technician Jobs or contracts to professional contractors to restore or replace your hardwood floors.

Step one: Removing Paint

We began by stripping the existing paint off the floors. This was extremely time-consuming, since the paint stripper had to sit on the floor for a minimum of four hours and it took about two to three hours to scrape a 2×4′ patch. The room is roughly 11×13′ plus a landing strip in front of the stairs that’s about 2×5′, so yeah, it took forever.

We used approximately four gallons of Back to Nature READYSTRIP paint stripper, and ended up spending roughly $140 total on it.
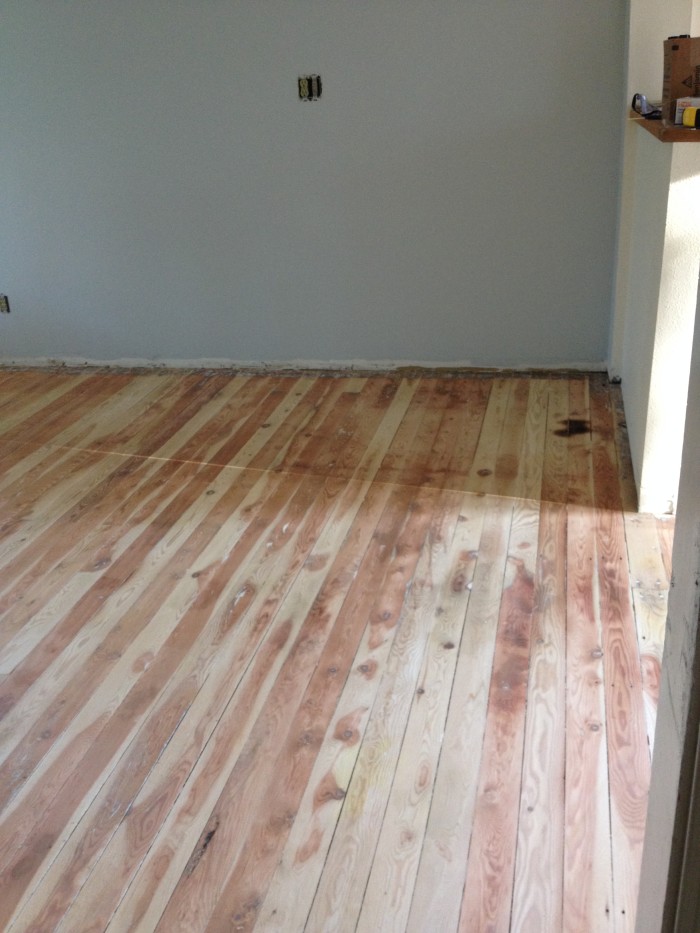
Step Two: Sanding

My dad suggested using a drum sander so this step would go quicker. (Mainly, I think he wanted an excuse to rent a drum sander.) He went ahead and rented one and we did a pass with 60 grit to see how well it worked, but ended up going with 40 grit to get all the paint up. This was followed by 60 and then 100 grit to finish off.

To get the edges, we used both a belt sander and an orbital sander. I think we ended up taking off probably 1/8″ of the boards total with all the sanding.

This is post-drum sander but pre-belt sander:

IMG_3429

Step Three: Whitewashing

I was sort of flying blind here. We followed this blog post as a guideline, but like, what finish do you buy for the paint? Should I get any generic white or should I color match it to something? How fancy of paint do I get considering we will be watering it down anyway?

In the end, I went to Home Depot and got a gallon of Glidden paint in eggshell, color-matched to Simply White by Benjamin Moore, since that’s the color of our trim. It cost $17. I asked the nice man at the Home Depot paint counter to give me whatever was the cheapest. I hazarded a guess at the eggshell finish. Who knows. I doubt it matters terribly much!

I used a quart jar for measuring and mixed one part paint to four parts water. It looked really white when I painted it on, but since it’s mostly water it actually dried pretty clear-ish. I spent MANY hours doing the first coat and was pretty happy with how it evened out the reddish tone of the wood, but it was also pretty subtle.

IMG_3452

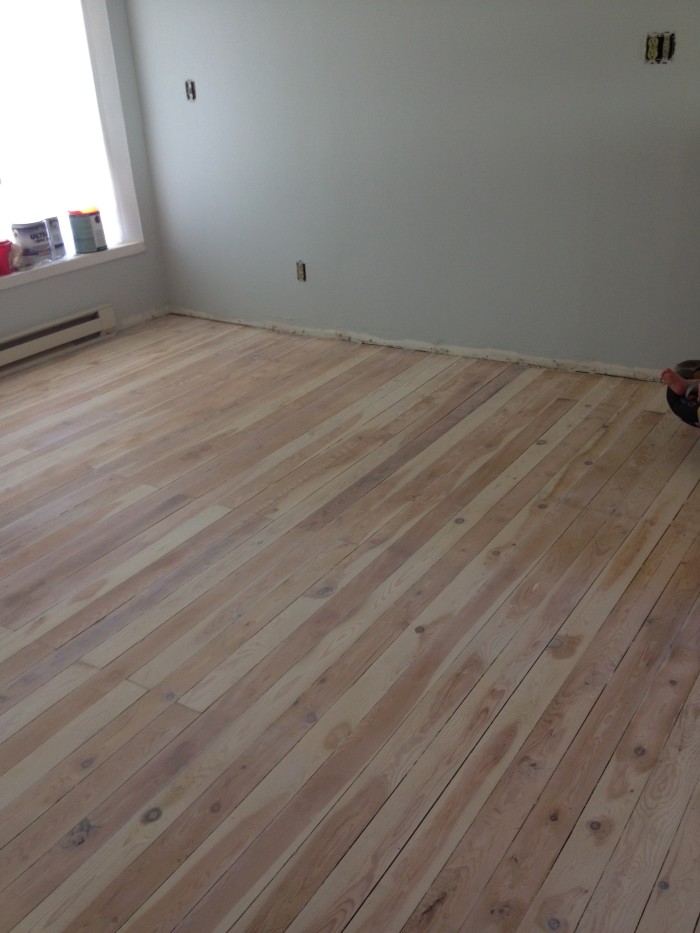
It looks a little different than the previous photo but you kind of have to think about it. After all that work, I decided I wanted it to look like we had done something to it, so I figured I should go whole hog and make it look whitewashed, not just “slightly lightened but still basically the same.” I embarked on a second and then a third coat once I realized how subtle a second coat still was.

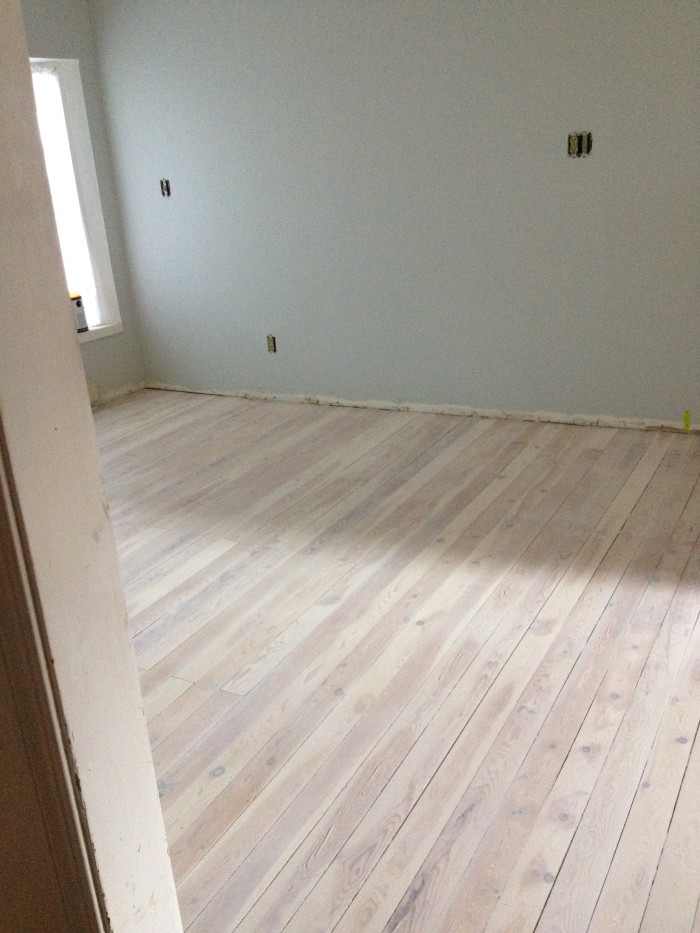
Here’s the difference between three coats (left) and one coat (right):

IMG_3457

Each individual coat didn’t look that different from the previous one, like it was hard to tell one from two and two from three, but the difference between one and three was pretty pronounced. That made me feel a lot better about deciding to add more coats!
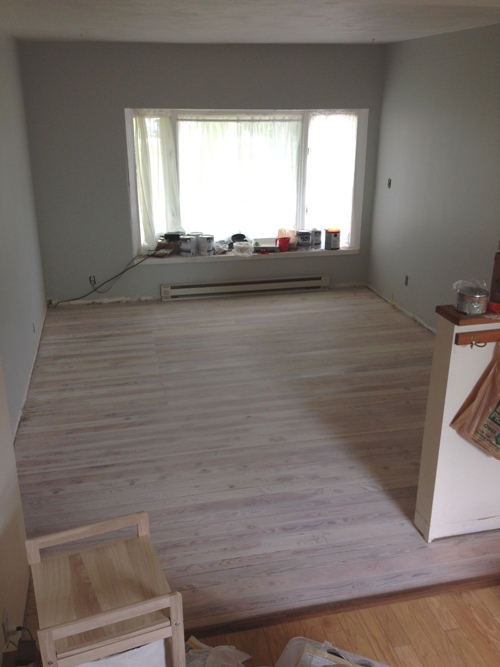
How did it end up?

IMG_3458

IMG_3459

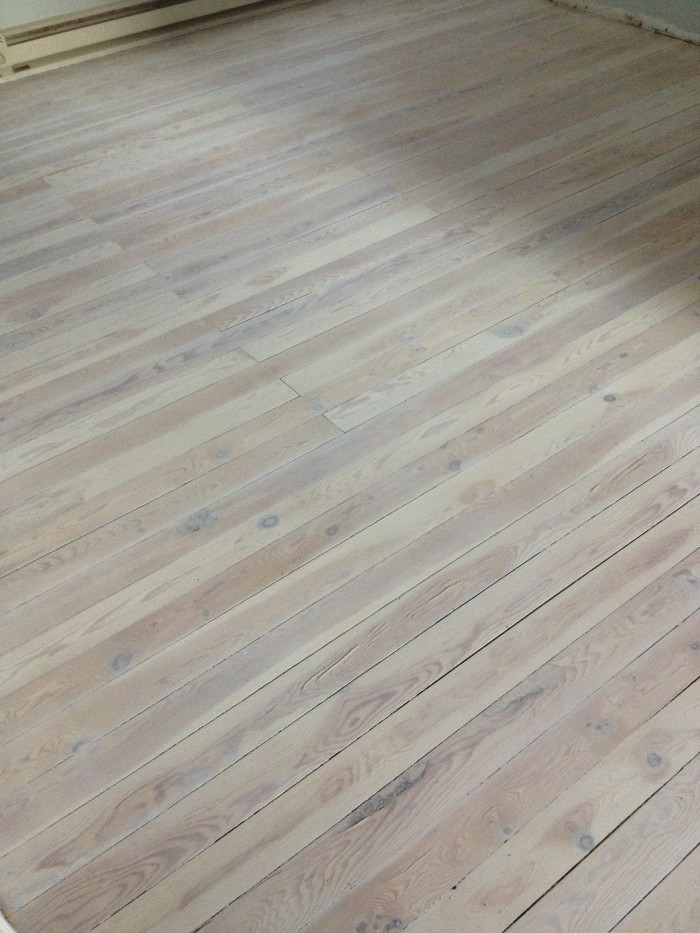
Look at that! It looks so gooooood! It’s like all of my Pinterest dreams come true! It looks all light and Nordic! Even though it was a ton of work, I am so glad I went with three coats of whitewash.

Step Four: Finishing

It was hard to determine how to finish the floor. All the blog posts I found either used a product not available in my country, or they mentioned specifically choosing non-yellowing polyurethane and then DIDN’T SAY WHAT THEY GOT. I was afraid of polyurethane because what if I picked a yellowy one and ruined my whitewashed floors? And you can’t walk on a freshly finished floor for X amount of hours which is NOT POSSIBLE for us given the layout of our house.

In the end, we went with Trewax clear paste wax which is a carnauba-based wax that specifically mentioned being used on floors. Reviews on Amazon said it was hard wearing and durable, even with kids and pets.

I don’t know anything about waxing floors but I went for it anyway. I started with actual cheesecloth but that ripped too easily, so I switched to a rag that was basically a white Hanes t-shirt. I put a golf-ball-sized lump of wax in the center, wrapped it up, and rubbed it on the floor. After about 5-10 minutes, I used a clean rag to buff the excess wax off. Repeat x10000000 boards. (Somebody who actually knows how to refinish floors is probably clutching her heart and cursing my name right now, but hey, we all gotta start somewhere.)

I liked the finish – it smoothed the boards out a bit and it doesn’t really look any different. Marginally shinier.

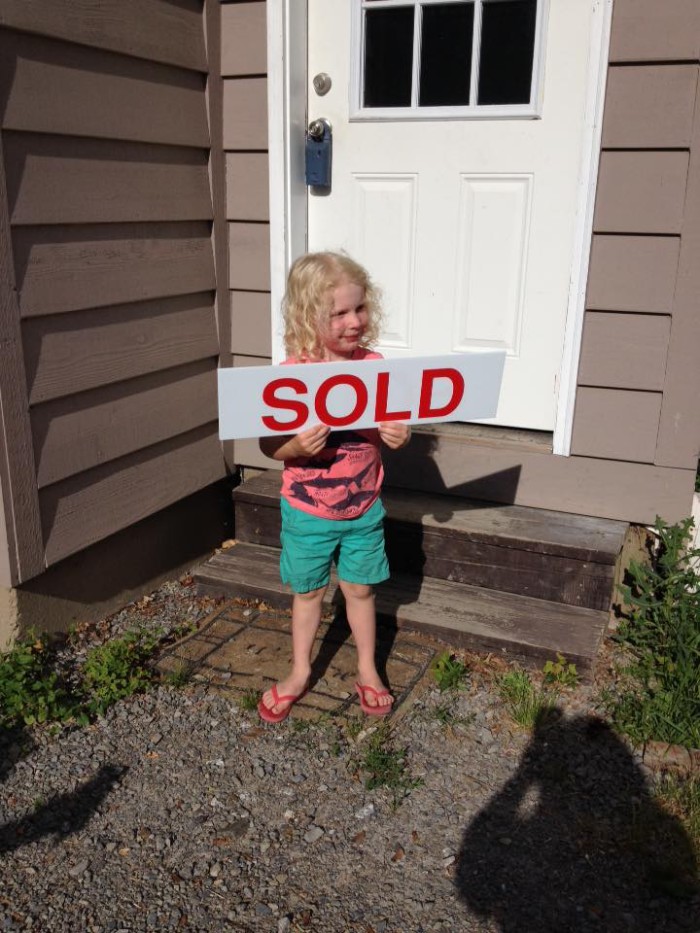
Step Five: Rejoicing

IMG_3466_edited

I AM SO GLAD TO BE DONE.

We can finally start using the living room like a living room instead of it being this empty hole that sucks all our free time. My dad is going to help us put up our new trim soon so I expect this room to look super nice afterward.

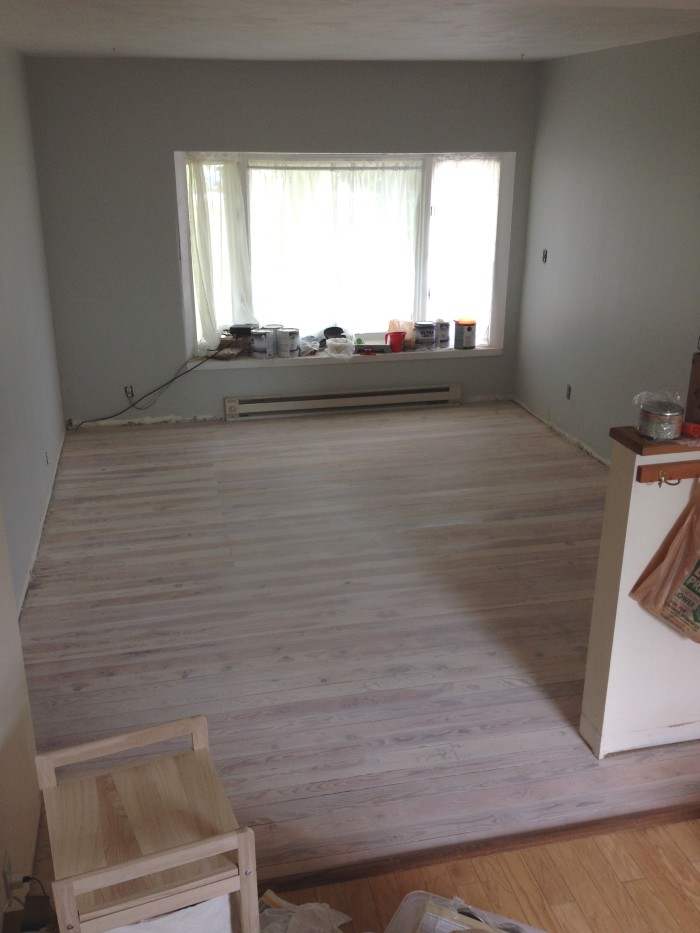
And now for some dramatic before-and-afters:

Before:
living-room-before

After:
living-room-after

1 Comment >

July 11, 2015 8:14 pm

We got the house!

After some back and forth where I felt like we made a lot of concessions and the seller made very few, we closed on our house June 15th!

Before this, we’ve looked at a few duds so far. One was cute and had a nice kitchen, but it felt small and kind of dark and was in a weird location. Another was super small – a one-bedroom with something they called an “office or non-conforming bedroom” that was basically a glorified closet and MIGHT have fit a twin bed inside but nothing else, and every room felt like it was desperately trying to be a different kind of room. The living room felt like the master bedroom, the master felt like a utility room that would have housed a water heater, etc. It did, however, have a gorgeous giant cast-iron sink with double dish drainboards. I wanted to take it home with me.

Then we happened upon what I’ll call the Park house. Park house was listed at the top end of our (very modest) budget, but was across the street from a popular park and had a big, pretty, landscaped yard. I’ll begin by saying the yard was truly the best part of the house. It needed a lot of cosmetic updates inside, and while it did have a new gas stove and some newer laminate flooring, it had a LOT of structural issues. The bathroom floor was squishy and the tub surround was in pieces and held in with aluminum foil. It needed a new roof which can be installed by companies who may have the knowledge that when choosing roofing shoes, visit https://www.housereal.net/best-shoes-for-roofing/ for recommendations. It needed new siding. Then we happened upon what I’ll call the Park house. Park house was listed at the top end of our (very modest) budget, but was across the street from a popular park and had a big, pretty, landscaped yard. I’ll begin by saying the yard was truly the best part of the house. It needed a lot of cosmetic updates inside, and while it did have a new gas stove and some newer laminate flooring, it had a LOT of structural issues. The bathroom floor was squishy and the tub surround was in pieces and held in with aluminum foil. It needed a new roof. It needed new siding.

Since then, it’s been a whirlwind of painting, house updates such as residential roofing replacement (looking into fiberglass roofing with the help of professionals that do roof replacement and roof repair in Durham, NC) and gutter replacement, babyproofing, and DIY floor refinishing, a topic on which I have a nice big post prepared. I’m hoping to document a lot of our changes to this house, because they’re relatively small in the grand scheme of things but I think they improve the look and feel immensely.

Hurray! We’re homeowners!

Sold

1 Comment >

May 19, 2015 12:36 pm

Adventures in homebuying

Renting is kind of insane in my hometown – it’s often cheaper to purchase a home than it is to rent one. We got preapproved for a loan recently and while our monthly payments would be higher than what we’re paying right now, they’re several hundred dollars cheaper than it’d be to rent a house. After salivating over houses online for the past eleven years, we finally started going out and viewing some potential homes such as Beaufort SC real estate and communities with new homes. Are you also considering to live in Cyprus, located in a beautiful island nation in the Mediterranean Sea? Aside from it is a popular tourist destination, it is also a great place to live. You may visit https://ilisters.com/the-10-best-places-to-live-in-cyprus/ for top living spots.

We’ve looked at a few duds so far. One was cute and had a nice kitchen, but it felt small and kind of dark and was in a weird location. Another was super small – a one-bedroom with something they called an “office or non-conforming bedroom” that was basically a glorified closet and MIGHT have fit a twin bed inside but nothing else, and every room felt like it was desperately trying to be a different kind of room. The living room felt like the master bedroom, the master felt like a utility room that would have housed a water heater, etc. It did, however, have a gorgeous giant cast-iron sink with double dish drainboards. I wanted to take it home with me.

Then we happened upon what I’ll call the Park house. Park house was listed at the top end of our (very modest) budget, but was across the street from a popular park and had a big, pretty, landscaped yard. I’ll begin by saying the yard was truly the best part of the house. It needed a lot of cosmetic updates inside, and while it did have a new gas stove and some newer laminate flooring, it had a LOT of structural issues. The bathroom floor was squishy and the tub surround was in pieces and held in with aluminum foil. It needed a new roof. It needed new siding.

The upstairs was half finished bedroom and half unfinished attic, but the floor was INSANELY BOUNCY and made me run screaming from the room when my dad jumped on it to test it. You could feel the whole house shake! The stairs weren’t up to code and had a really short run, so your whole foot wasn’t able to fit on the stair and you felt like you were tripping the whole way up. It didn’t have any closets anywhere in the whole house.

It also had that old tile in one of the bedrooms that had vermiculite (asbestos!) adhesive underneath, and the siding was all asbestos as well. POISON HOUSE!

On the bright side, it had a nice flow from the living room to the dining room to the covered deck and then the big backyard.

I made pro/con lists and everything on my pro list were things like “I like the doorknobs”  and everything on the con list was like “needs stucco repair“, “needs new roof immediately”, “needs emergency plumbing services“, etc.

We temporarily lost our minds did make an offer on it, but they countered with more than we felt the house was worth, so we walked away. Whew! Park house was in a nice location but oh my god, literally everything else was wrong with it.

A few weeks later, I stumbled across what I’ll call the Reach house. It was listed for roughly $20K more than our budget allowed, but it was an older house that looked like it might have needed some updates, so I requested to see it just for comparison purposes. It wasn’t anything fancy, but it did have a massive fenced backyard.

We went to go see it. Reach house reminded me of many Portland rentals – structurally sound but old and lots of painted wood. It had a mudroom (where we could store our stroller and bike trailer instead of them taking up space in my living room), and a cute entryway and hardwood floors and a normal staircase.

It had a long-lasting metal roof that was well maintained with the help of residential and commercial roofing services such as commercial roofing services in Elkridge, MD, the siding was fine, and none of the floors were squishy or bouncy. If we needed it repaired, we can easily call an expert like this roofer in Weatherford, TX. The yard had some raised-bed gardens chock full of healthy looking strawberry plants. It had a washer, dryer, and dishwasher! And a broom closet! A dutch door to the kitchen! A shop for storage!

There are several things I’m kind of iffy about still – it has a shower enclosure but no tub, which will suck for bathing a baby. It has baseboard heating, which is expensive, AND it only has two baseboards to heat the entire house. I predict we will freeze to death in the winter unless we install a gas fireplace or something right away. The kitchen is made for tall people – I can only reach one cabinet easily, so I guess that’ll be the dishes cabinet and to hell with the rest. The downstairs bedroom has a big sliding door to nowhere.

BUT!

Our realtor let us know that the seller was about to drop the price on it, which then made it within the realm of possibility. We offered an amount squarely within our budget, and the seller countered with a price a little above it. My parents offered to help cover the difference (which is SUPER NICE OF THEM! Thanks Mom and Dad!) and we accepted.

AAAAAAAAAAAH!

We just had the inspection done and there are a few things we should fix (like one of the support beams under the house is just… lying on the ground) but overall it seems pretty solid. I doubt we’d find a better option in our price range if we kept looking – especially not a three-bedroom house in the neighborhood we’d like.

If we do get it, I plan on blogging some of the updates we plan on making because we’ll be doing a lot of the work ourselves. (Well, with my dad and uncle since they actually know what they’re doing.) I’m excited to learn how paint rooms and patch drywall and I want to get a fancy power saw and re-do a lot of the super-basic molding and baseboards. This little house has so much potential and I think it’s a great option for us. If you’re looking for more houses you can reach out professionals such as limehouse estate agents.

This is all very new and exciting. We have our fingers crossed that it works out!

5 Comments >